

Automatically synchronize your foreign currency transactions in QuickBooks with the help of Synder. Depending on your setup, Synder will create transactions in the original foreign currency in QuickBooks or convert them to your home currency according to the exchange rate provided by your payment processor directly in your QuickBooks multicurrency wallet. Thus, the software will automatically add conversion rates for your multicurrency sales. We strongly recommend consulting with your accountant to select the multicurrency setup that would work best for you. Here’s what you need to do to enable one of the most useful QuickBooks online features – the multicurrency feature (please, note that it cannot be undone).
Are you a Xero user? Here’s the guide on how to sync transactions in a foreign currency to Xero.
Please note: Before you start setting up Synder to deal with transactions in a foreign currency, make sure that you’ve enabled multicurrency in QuickBooks. Remember: once you have multicurrency ON in your QuickBooks, you won’t be able to turn it off.
Overview:
- Syncing multicurrency transactions into one bank account in QuickBooks (recommended)
- Synchronize each currency to its own bank account
- Creating Accounts in QuickBooks for foreign currency transactions sync
- Setting up accounts for multicurrency transactions in Synder
Syncing multicurrency transactions into one bank account in QuickBooks (recommended)
Once you connect Synder to QuickBooks, it creates a clearing account under your Chart of Accounts in your home currency (the account can be called Stripe (required for Synder), PayPal (required for Synder), etc.).
All transactions in all currencies along with exchange rates will be synchronized to this single account and converted accordingly.
There should be no conversion discrepancy, as the software takes conversion rates from the payment processor. Only in case it’s not possible, QuickBooks exchange rates for the corresponding transaction date are applied.
To access settings, select the organization needed at the top right corner of the page – – > the Settings button on the left menu of the software – – > select the payment platform (if you have several connected) you want to customize the settings for.

The setup for all transactions to be put into one account is ready by default, so there’s no need to do anything besides synchronizing transactions in multiple currencies in QuickBooks to check how it works for you.
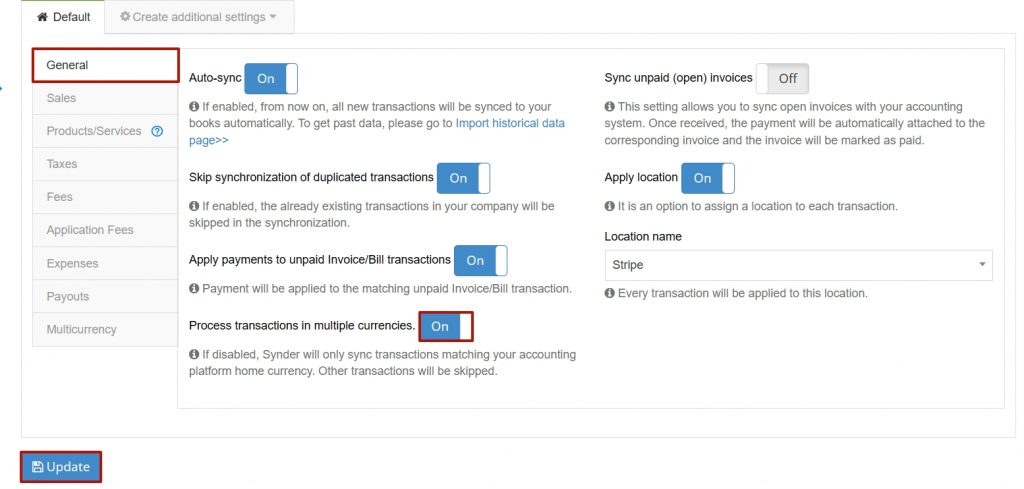
Note: please open the Synder settings (Gear icon in the top right corner) → General tab and make sure that Process transactions in multiple currencies is ON for the app to process all currencies. Otherwise, Synder will only sync transactions in your home currency.
Congrats, you’re all set and ready to sync transactions in multiple currencies!
Synchronize each currency to its own bank account
Recording original currencies during the synchronization will give you an opportunity to have each currency reflected in a specific account in your Chart of Accounts in QuickBooks. This flow was designed in case you have several bank accounts and receive payouts in different currencies.
During the setup you’ll need to:
- Set up accounts in each currency manually in your QuickBooks.
- Select these accounts for syncing Sales, Fees, Application fees and Expenses.
- Select your Checking Account for payouts in all of the currencies (unless you have separate checking accounts for each currency).
Creating accounts in QuickBooks for foreign currency transactions sync
You’ll need to go to your QuickBooks Chart of Accounts, create a new Bank type account in QuickBooks for each currency (e.g., Stripe (required for Synder) CAD, Stripe (required for Synder) EUR, and so on). The name of the type might vary from country to country. Look for the word Bank in the name of the Account Type.

Then you’ll need to go to Synder and select those accounts as Sales, Fees, Application fees and Expense Bank accounts. Below are the step-by-step instructions with visual aids to accompany you during the process.
Setting up accounts for multicurrency transactions in Synder
1. Go to Settings.
2. Go to the General tab.
3. Turn Process transactions in multiple currencies ON. Otherwise, Synder will only sync transactions in your home currency.
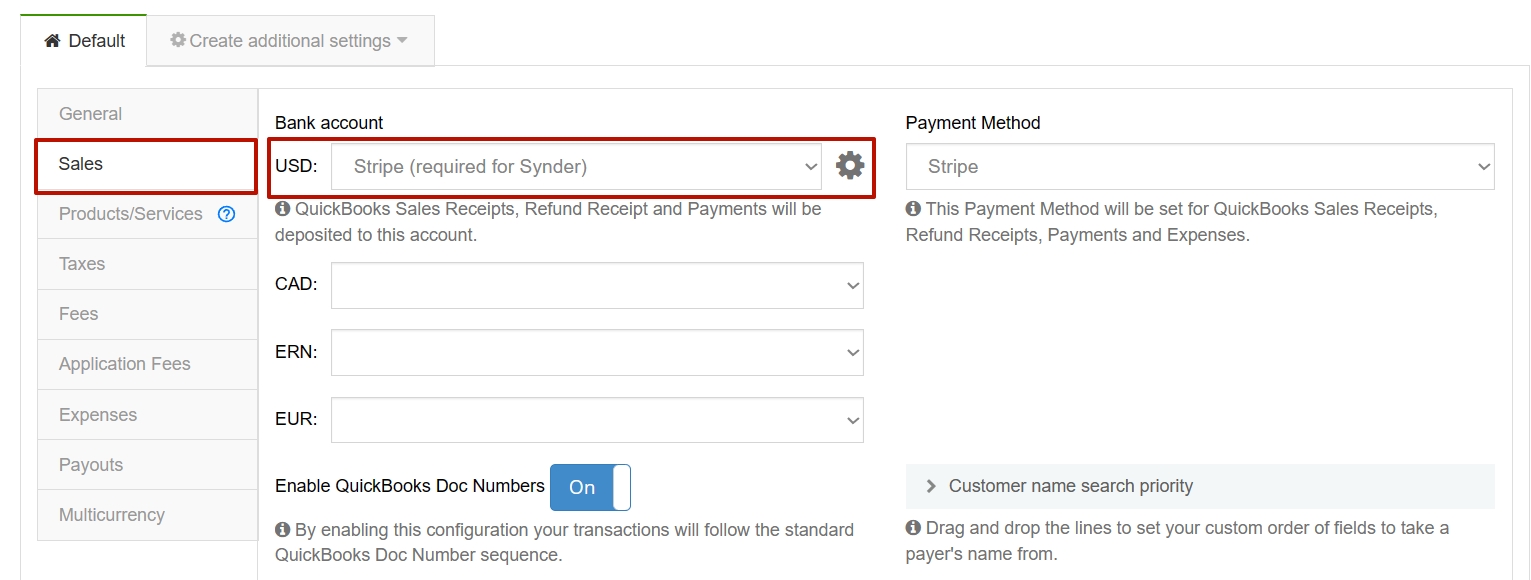
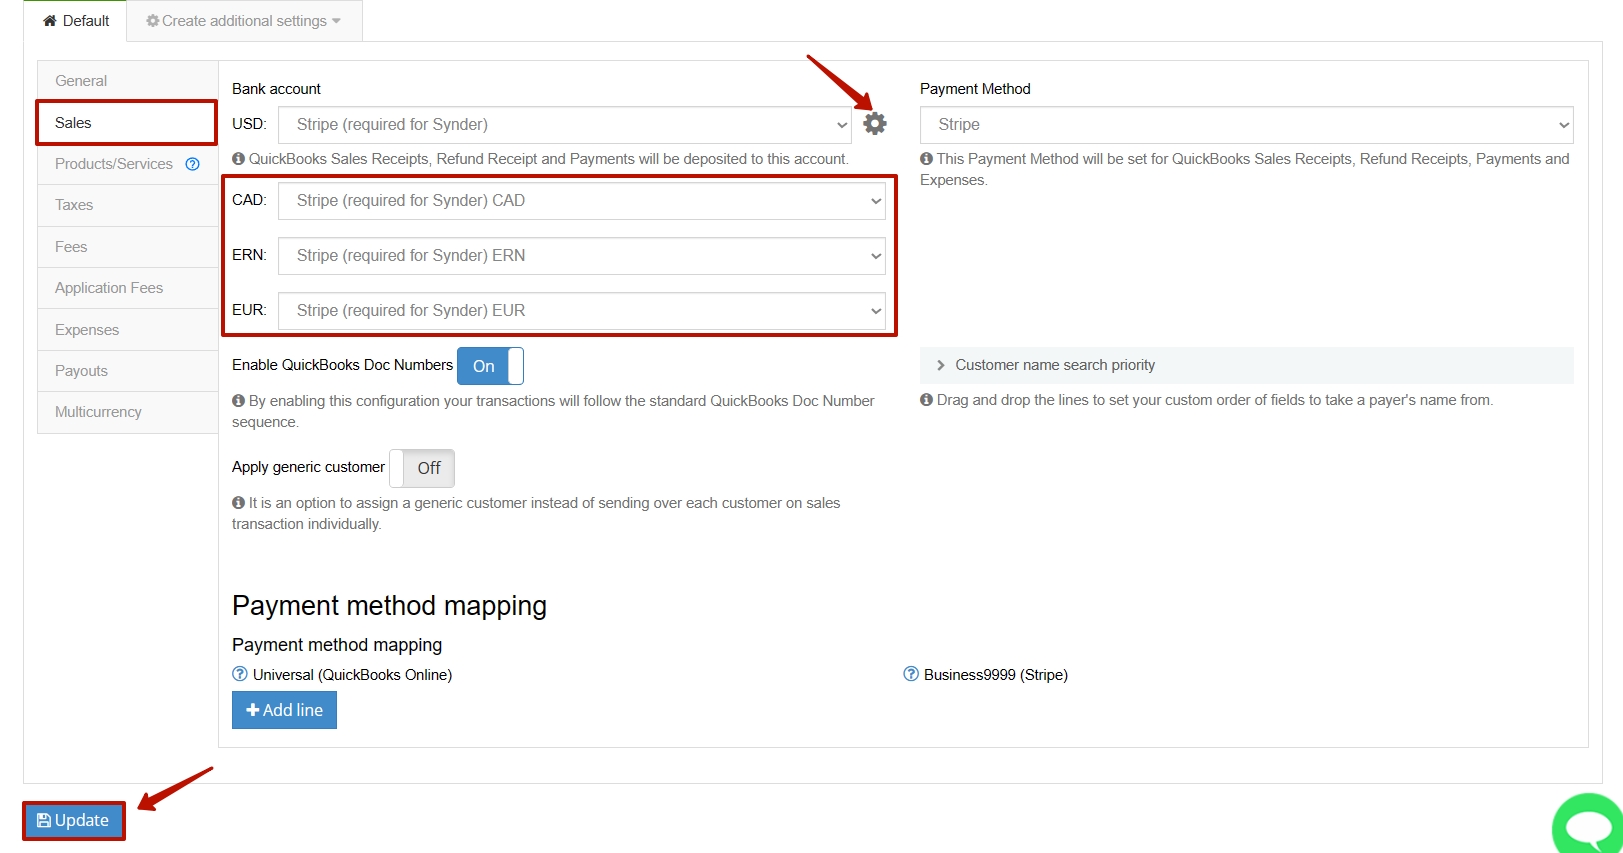
4. Go to the Sales tab and press the Gear icon.
5. Select any of the currencies that you’ve enabled in your QuickBooks and set up a Bank account where Sales Receipts, Refund Receipts, and Payments received in each currency will be stored.
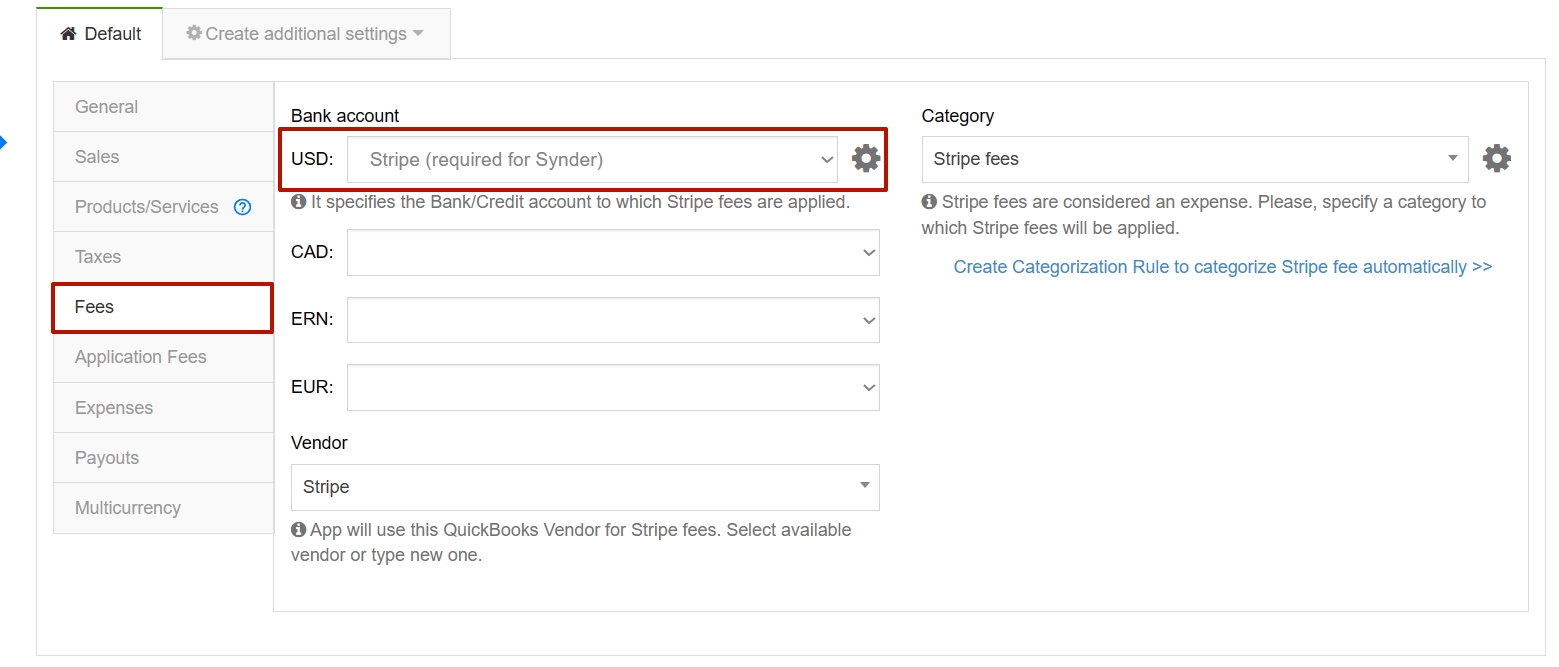
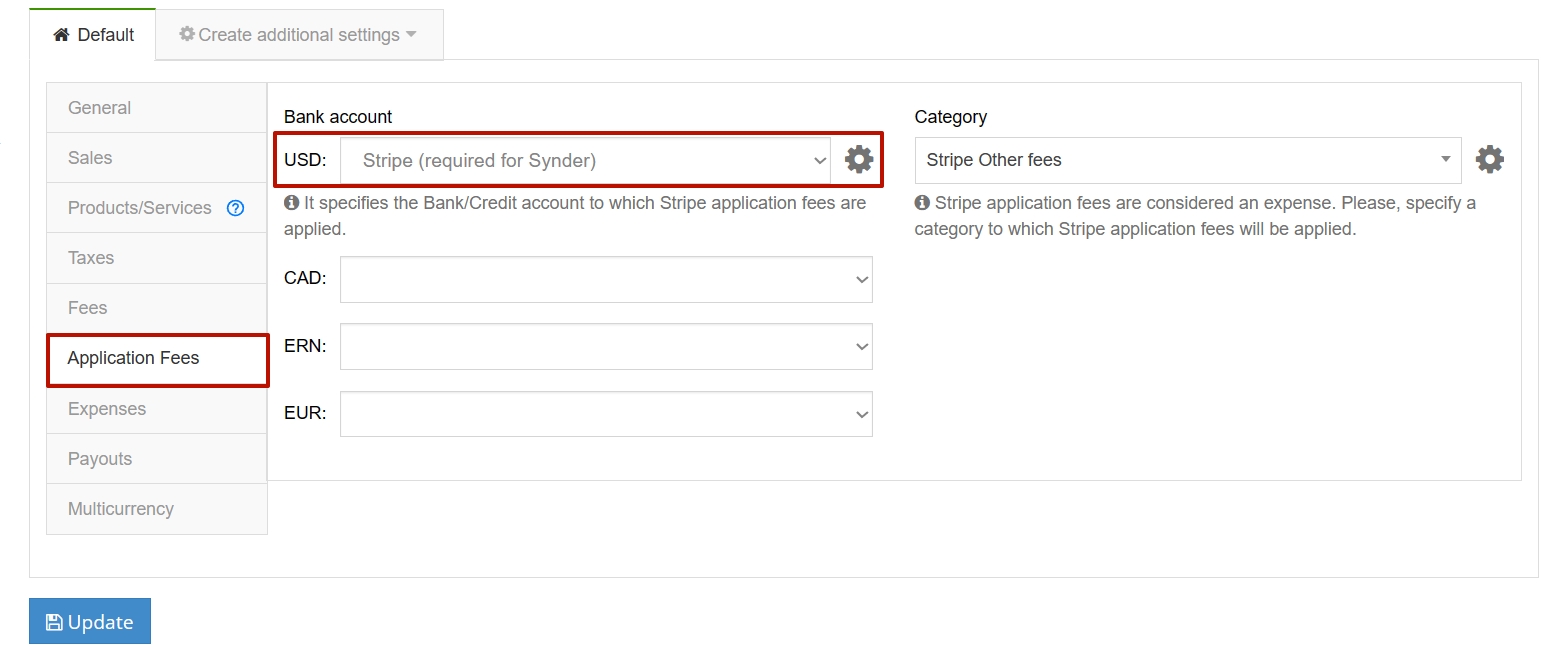
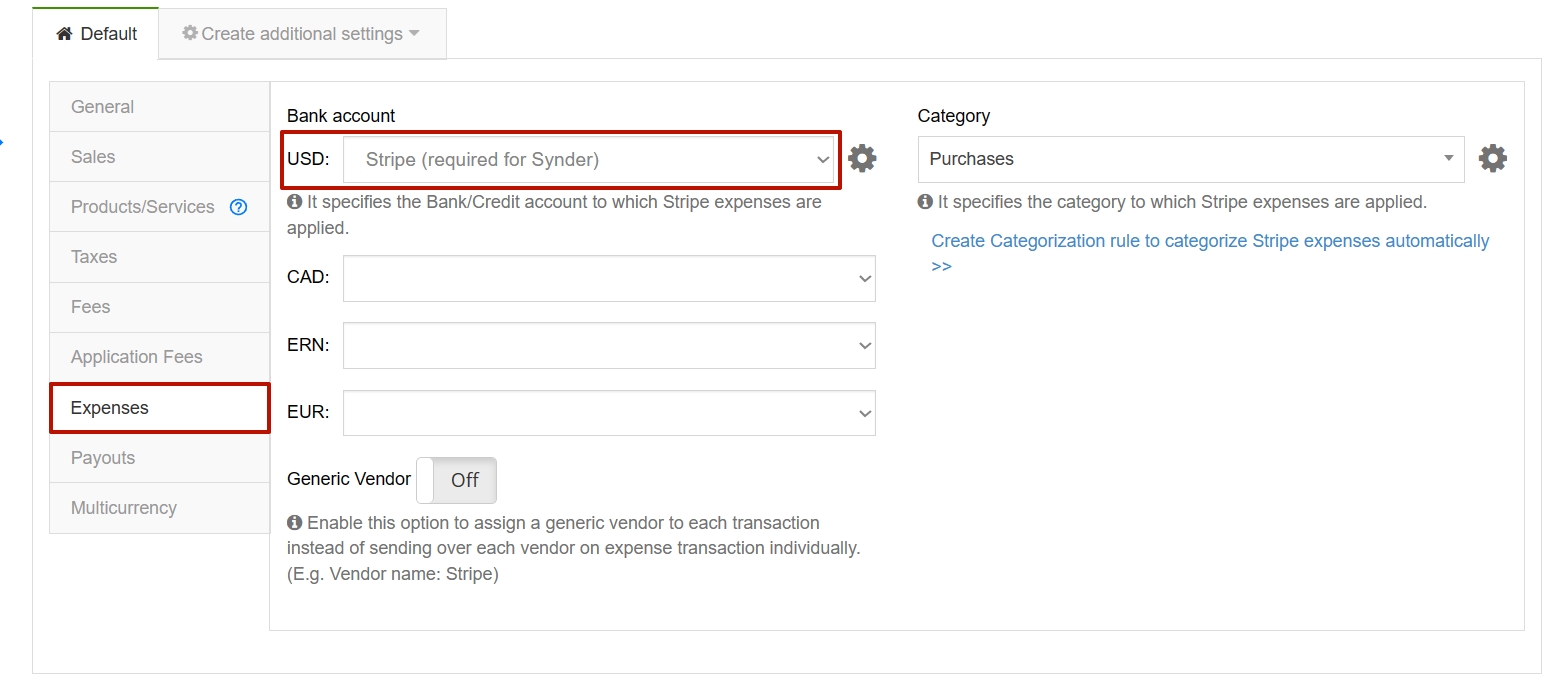
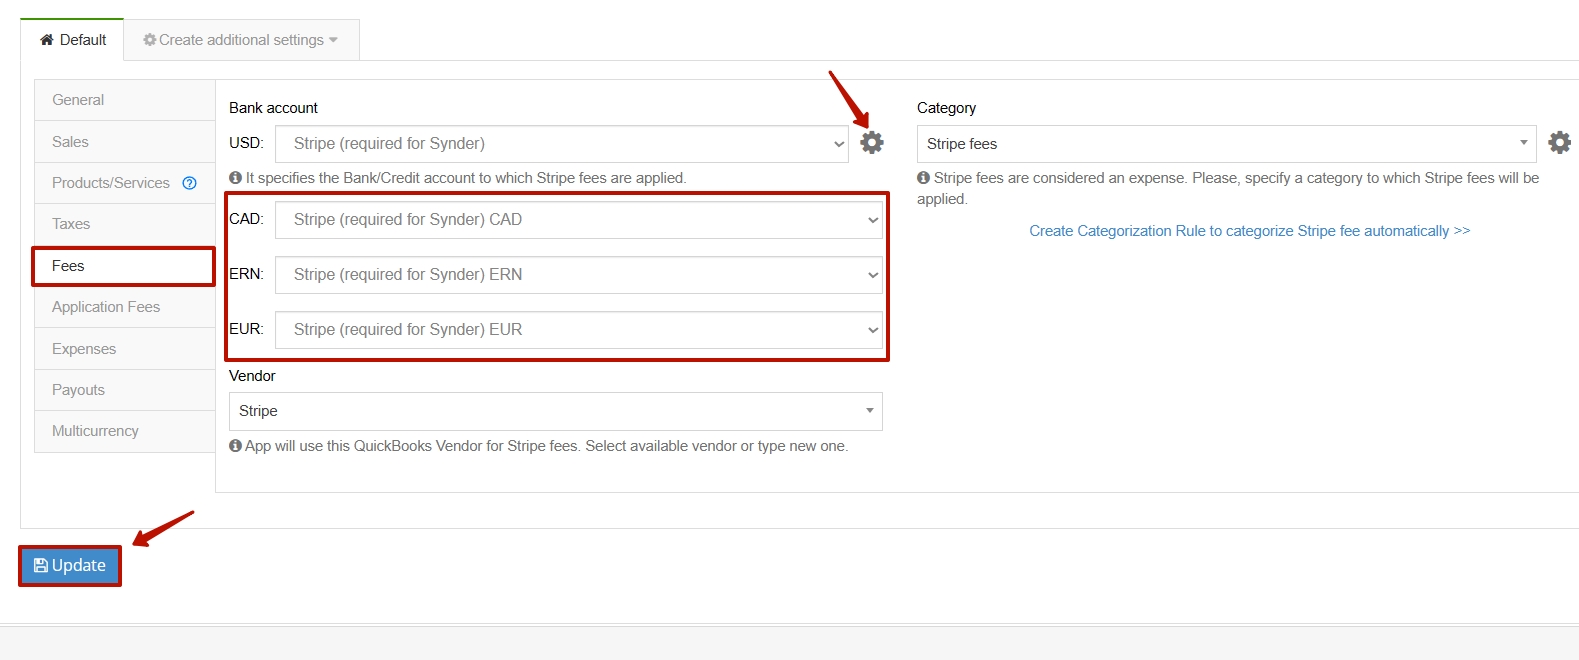
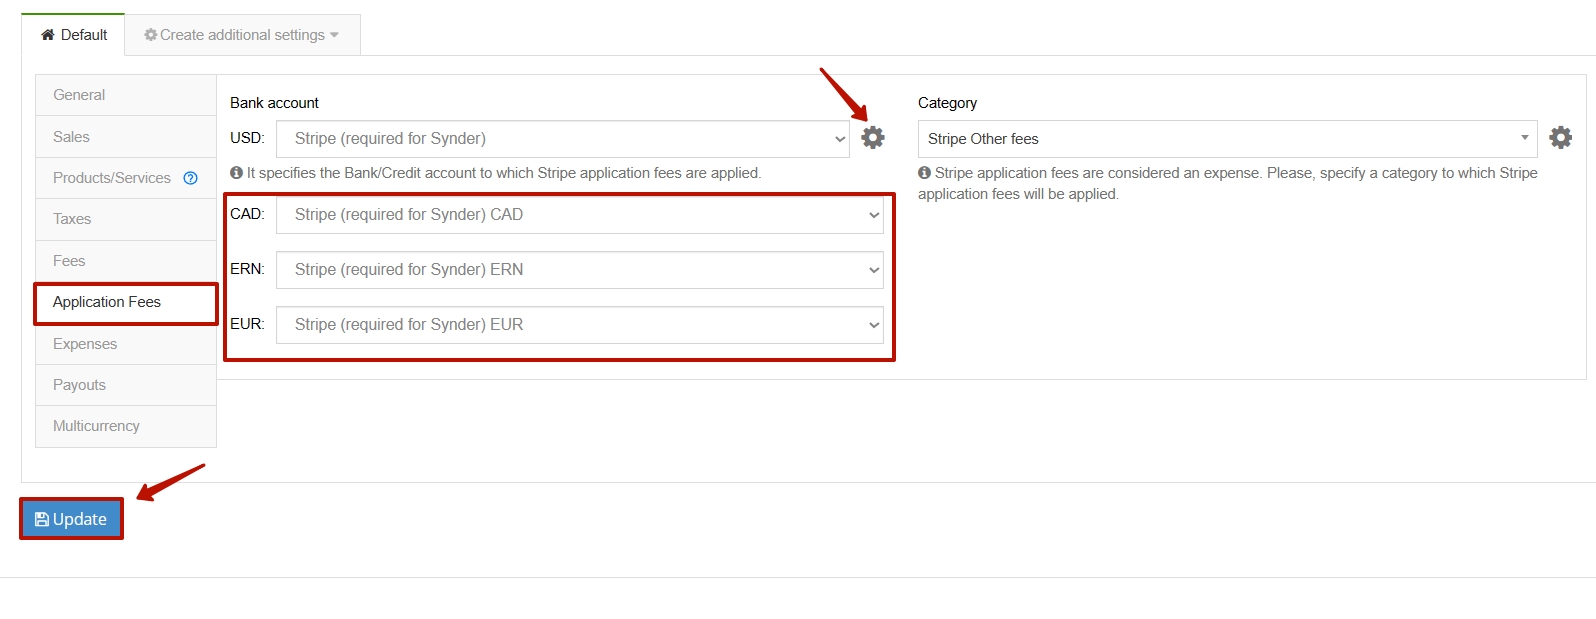
6. Repeat steps 4-5 for Fees, Application Fees, and Expenses (PayPal only).
NB: QuickBooks regards Fees as Expenses. The category needs to belong to the Expense type in the QuickBooks Chart of Accounts.
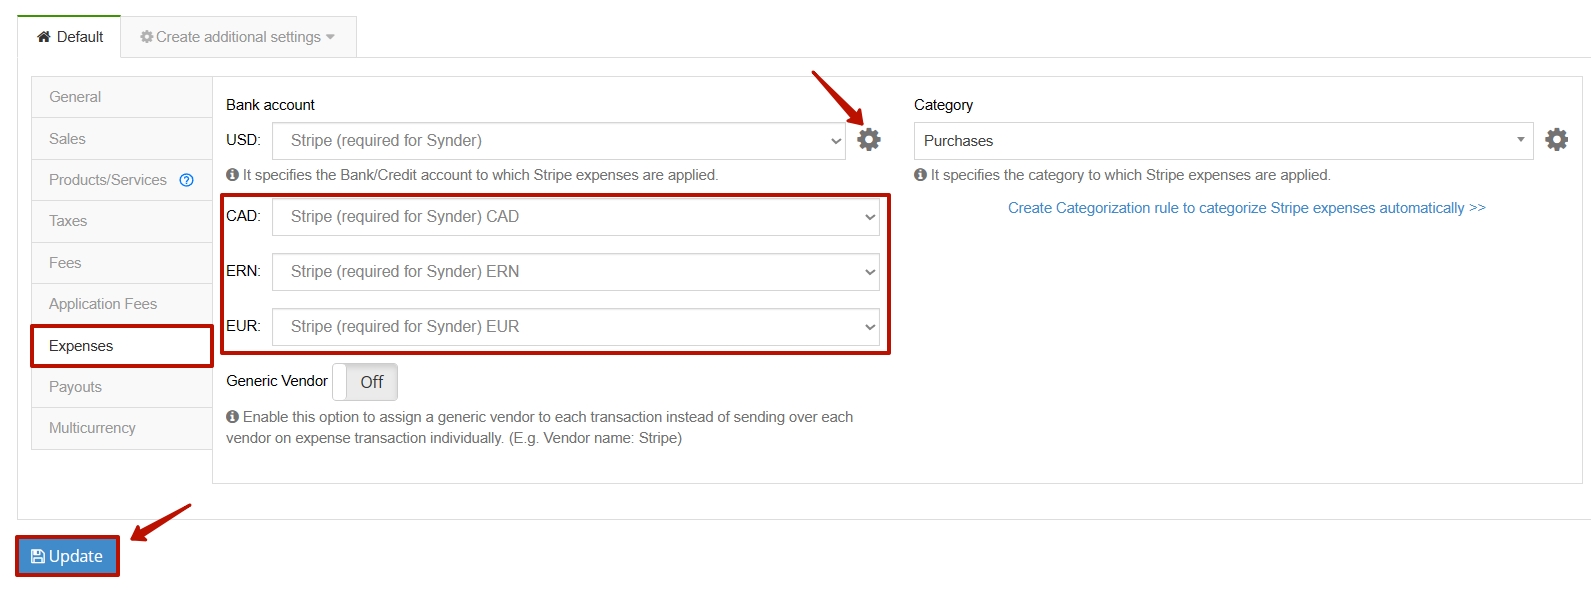
7. Meanwhile, for the Payouts tab, you should select your Checking accounts for each currency correspondingly.

8. Once you’ve filled out all the fields, remember to click Update and synchronize multicurrency transactions to your QuickBooks company.
Congrats! You’ve successfully set up to process multicurrency transactions in different accounts.