If you need to add Attachments to your Transactions (or any other entities such as Invoices, Bills, Estimates, Payments, Refund Receipts, Customers, etc.) in QuickBooks Online, you can use Business Importer. How to do this, read below.
How to attach documents to invoices or estimates or other transactions in QuickBooks Online
QuickBooks Attached documents: How to upload documents into QuickBooks Online separately without importing transactions.
Upload Documents into QuickBooks Online with Business Importer
If you need to Upload Documents into QuickBooks Online separately without importing transactions into QuickBooks Online (you can do it later or link them with the documents later, – check out in the previous post), follow simple steps:
- Create the file containing links to the documents you’re going to import to QuickBooks Online.
- You can download the template of import file at Business Importer’s How-to Guide (use Attachment list). Insert your links with the attachments into the File Link column in your Excel file. Business Importer supports DropBox links and general URLs.
- Go to Import tab and start your general import in Business Importer.
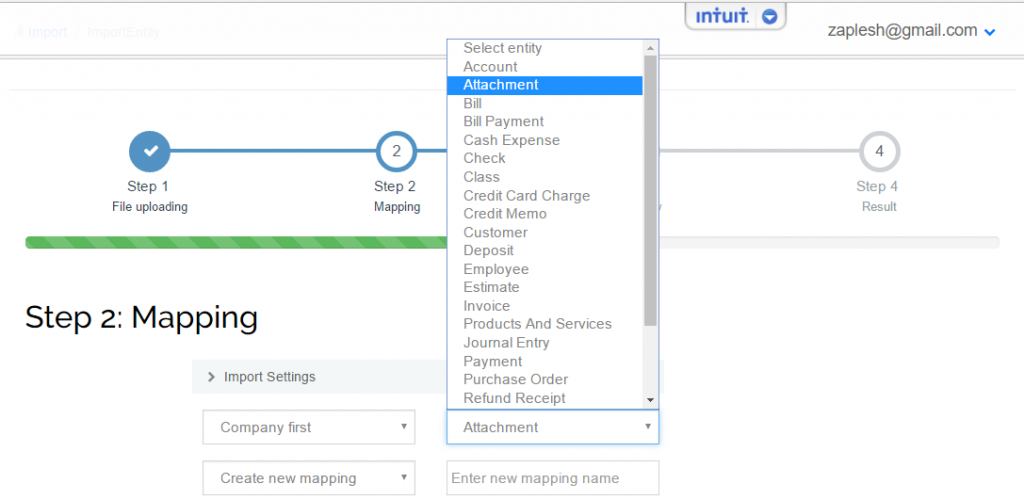
- In the Mapping step select Attachment entity and map your labels to QuickBooks Online labels.

File link label should be mapped to the Attachment column in your Excel (the one that contains links to your attachments).
Click on the Next button and start your import of attachments. - Your import is ready. Check out the import log. You can use Attachment IDs to link the attached documents with your transactions.

QuickBooks Attached documents: a series of articles
Read how to add new attachments to new documents in QuickBooks Online, how to add attachments (that have already been created/imported in QuickBooks Online) to new transactions in QuickBooks Online, how to import new attachments and link them to existing documents in new articles.
Remember, that any question you can address us. We will be glad to help you!
Just leave us a message, call us on (469) 629-7891 or write to support@cloudbusinesshq.com.

Comments open