Import Transactions to QuickBooks Online, using Business Importer. Read how to create, save and use your mappings during imports to QuickBooks Online in Business Importer.
Create, save and use your mappings during Excel import to QuickBooks Online in Business Importer
To save your time on bookkeeping work in QuickBooks Online, use the Mapping Saving feature in Business Importer.
To create and save your mapping in Business Importer, follow several easy steps:
- Sign in to Business Importer. Prepare your Excel file you’re going to import into QuickBooks Online.
- Go to the Import tab, and upload your file.
- Select sheet and entity, and company you’re going to import your Excel with transactions into.
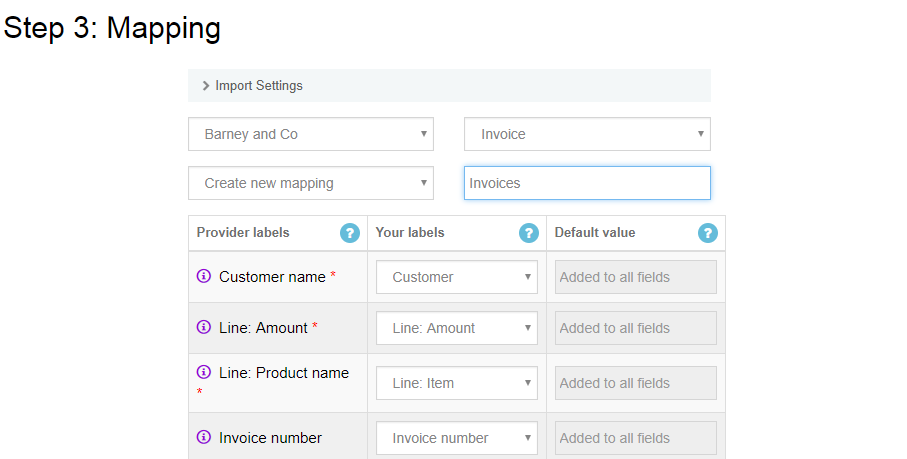
- Connect your labels to QuickBooks Online labels.

- Business Importer will save your mapping automatically (giving name by date, time and entity). If you want to give a name to your new mapping, fill in a name for your new mapping (for example, Invoices) in the appropriate window.

Press on the Next button. - Preview your mapping. Make sure all labels are connected in a correct way. Press on the Next button.
- Your import is running. Your mapping is saved.
To use your saved mapping, follow simple steps:
NOTES:
- Apply Saved Mappings to the same entity/transaction, and the Excel file containing the same columns names.
- You can Rename, Copy and Delete mappings.
Remember, that you can address us with any question you might have. We will be happy to assist.
Leave a message, email support@cloudbusinessltd.com or call us at (302) 261-3644.


Comments open