Business Importer Desktop: Reference Number Guide
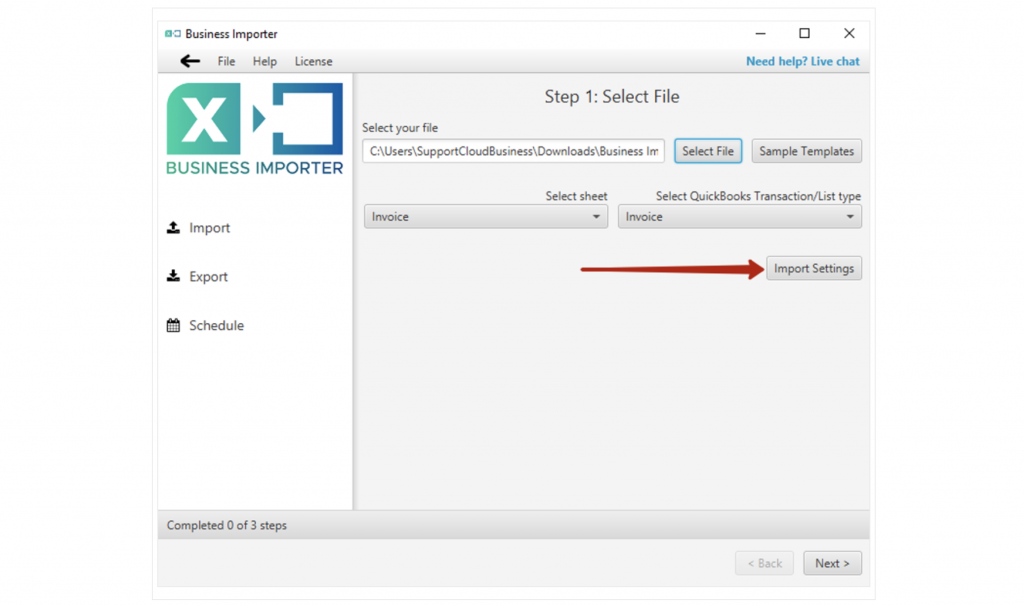
In order to access Reference Numbers settings menu, click Import Settings button in the Main Window of Business Importer.
Reference Numbers can be imported by Business Importer in 3 ways:
1. Reference Numbers consequence set in Business Importer settings
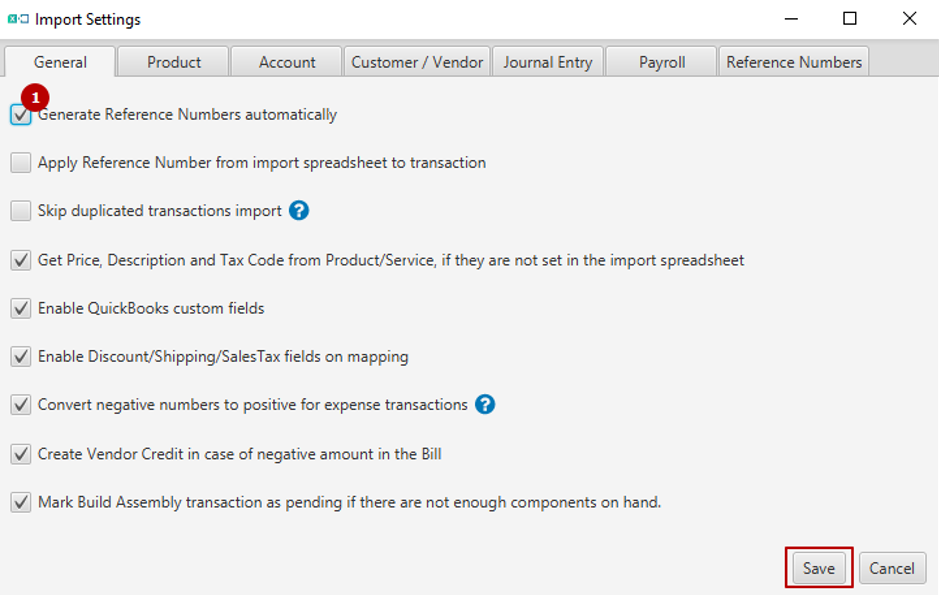
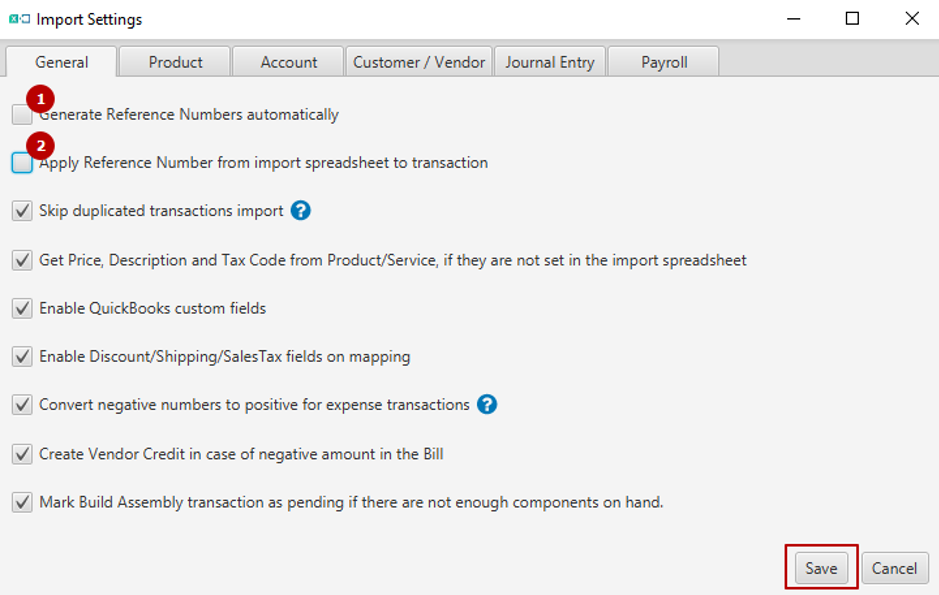
If Generate Reference Numbers Automatically feature is ENABLED, Reference Numbers tab will be shown in Business Importer settings and import flow will be as follows:
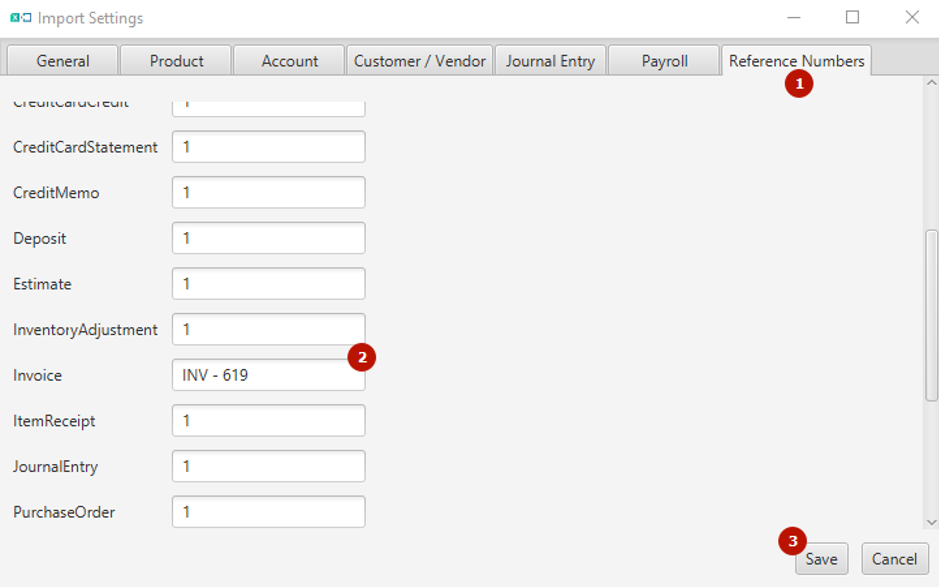
1. Go to the Reference Numbers tab.
2. Specify Reference Number, from which import consequence starts.
3. Click Save.
NOTICE: If you need to import Multi-line transactions, the same Reference Number must be specified for each line of one particular transaction. For Example:
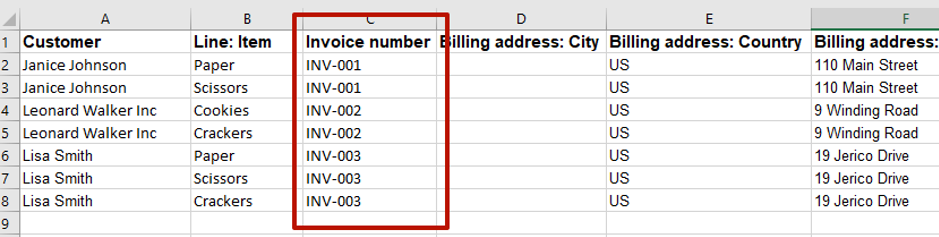
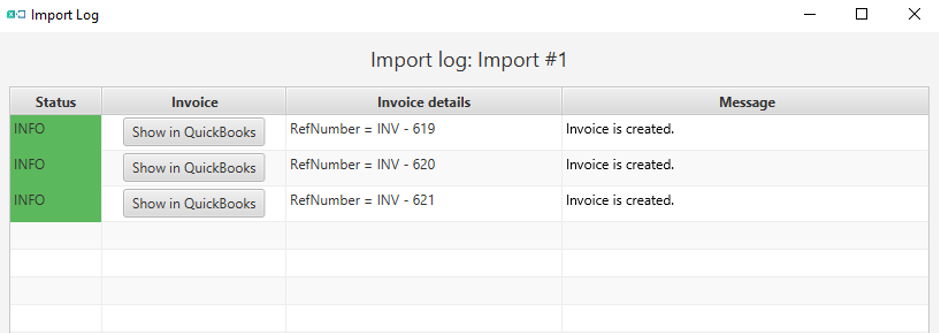
Will be imported as:
2. Reference Numbers imported from uploaded spreadsheet
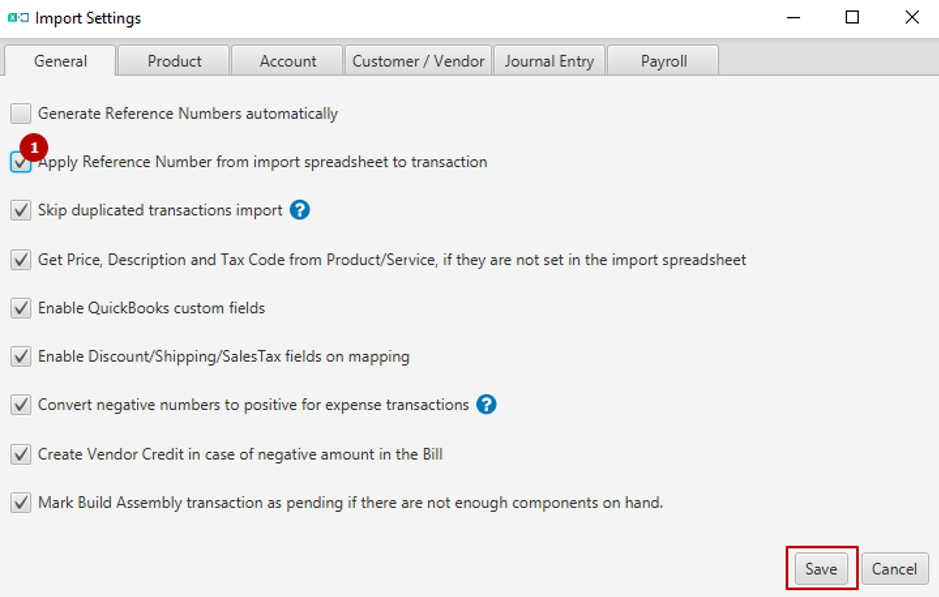
If Apply Reference Number from Import Spreadsheet to Transaction feature is ENABLED, Business Importer will apply Reference Numbers, specified in an uploaded spreadsheet and import flow will be as follows:
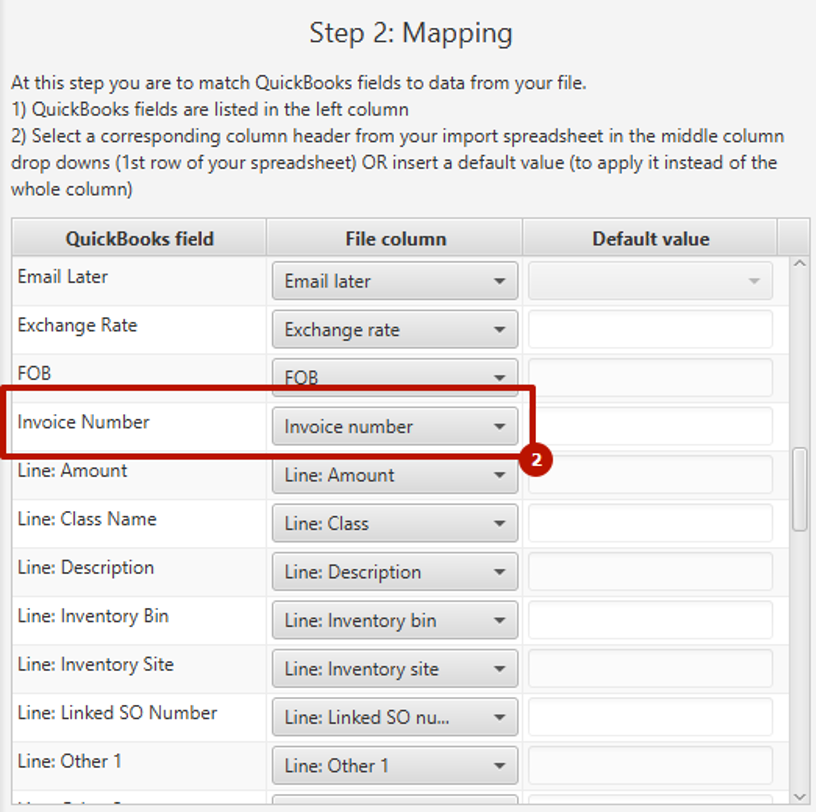
1. Specify Reference Numbers in a spreadsheet.
2. Map the Invoice Number field with corresponding header from your spreadsheet
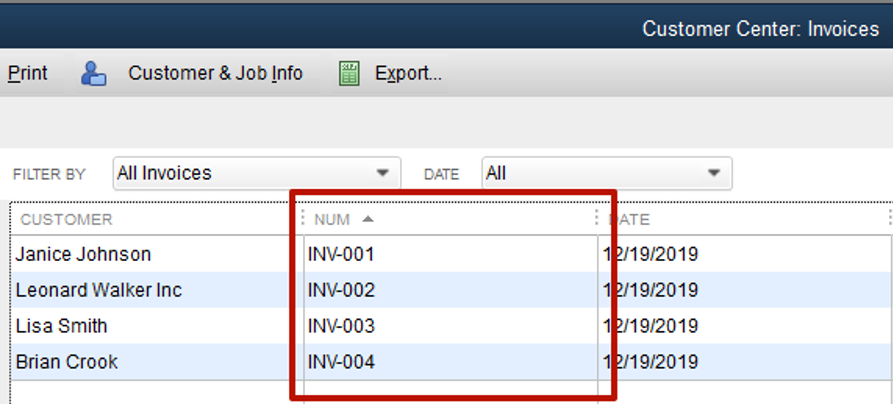
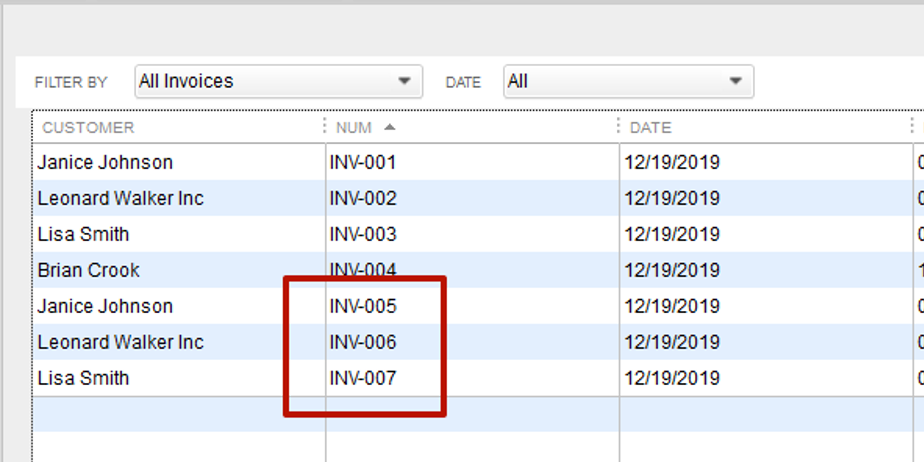
3. Reference Numbers consequence picked up from QuickBooks Company
If Generate Reference Numbers Automatically and Apply Reference Number from Import Spreadsheet to Transaction are DISABLED, Business Importer will pick up QuickBooks numeration sequence:
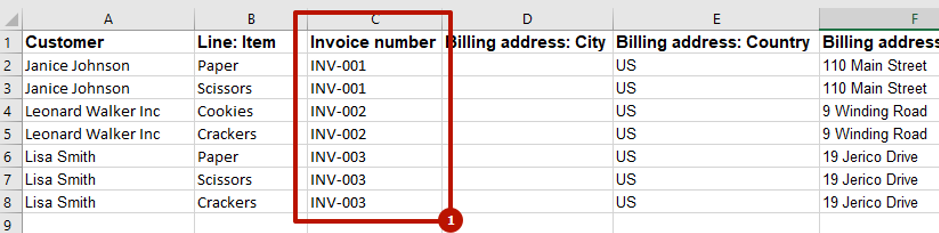
NOTICE: If you need to import Multi-line transactions, the same Reference Number must be specified for each line of one particular transaction. For Example:

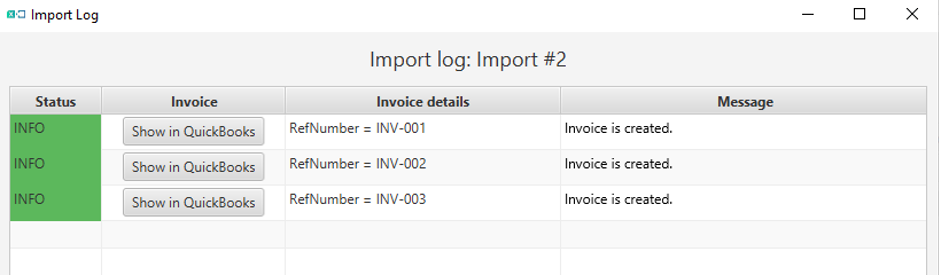
Will be imported as:
However in order to correctly import transactions with several products we recommend to still map transaction reference Number column specifying the same numbers for all lines of one transaction.
Remember: if you have any questions you can address them to us. We’ll be glad to help you!
Just leave us a message filling out our contact form or use the phone/email mentioned in the footer of every page.
Comments open