
How to update Display name for Customers, Vendors and Employees in QuickBooks Online using Business Importer
Update Display names of Customers, Vendors and Employees in your QuickBooks OnlineⓇ company within one upload of an Excel file using Business Importer app.
Overview:
- Steps on how to update Display name for Customers, Vendors and Employees in QuickBooks Online.
- Useful Tips on how to update Customers, Vendors and Employees.
Note: Display Name Update cannot be reverted..
Steps on how to update Display name for Customers, Vendors and Employees in QuickBooks Online
File adjustment
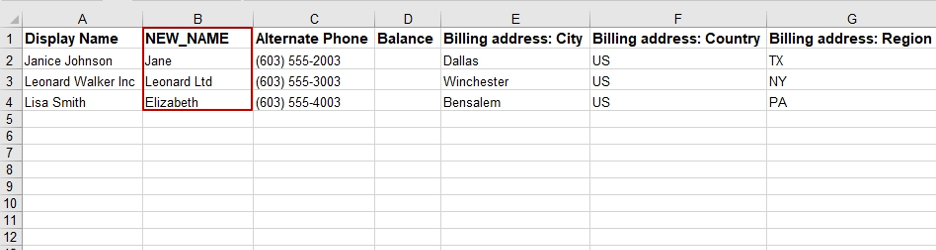
Prepare your Excel file with the Customers you want to partially update: create a new column named exactly NEW_NAME and specify new Display names for Customers, Vendors and Employees you want to update in that column.
Select Entry for Update
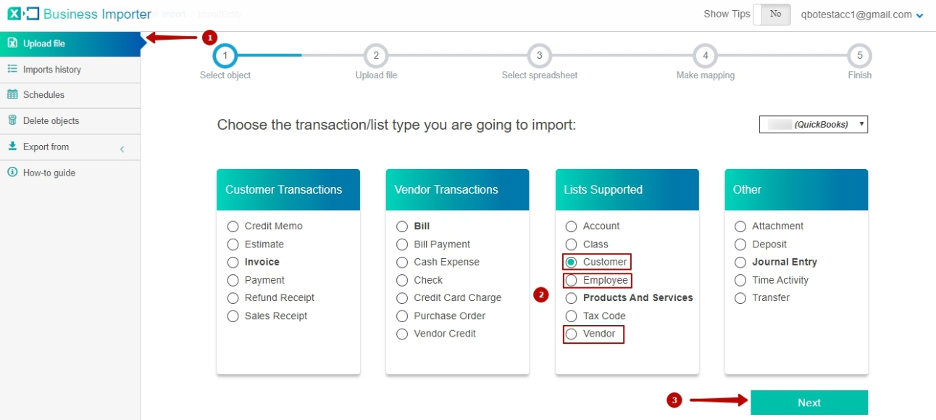
- Go to the Upload file tab.
- Select the entity you would like to update display names for (Customer, Vendor or Employee).
- Click on the Next button.
Upload the file
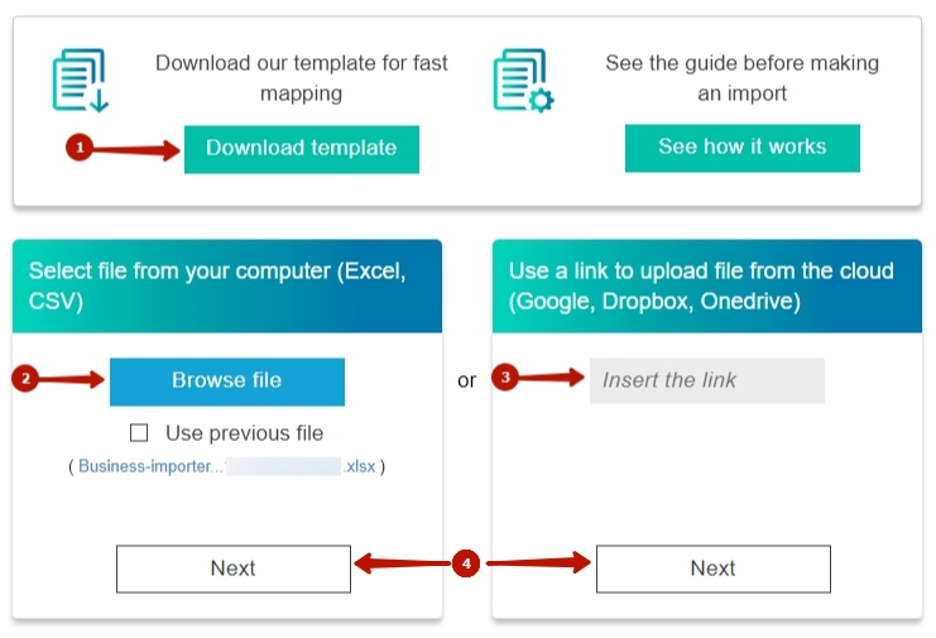
- Download our template attached in this guide or use your own custom file.
- Upload an Excel file from your PC.
- Or insert a link to the file from a cloud storage (Google Drive, Microsoft OneDrive, DropBox).
- Click on Next.
Mapping step
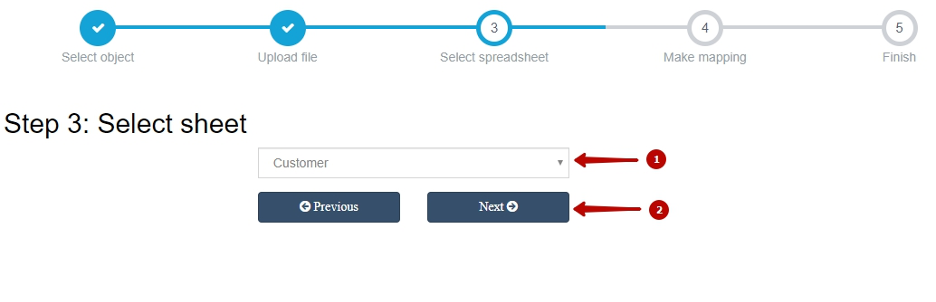
1. Select the necessary sheet from your file.
2. Click on the Next button.
3. Select your company.
4. Check whether you have selected the right entity to update Display Name for (Customer, Vendor or Employee).
5. Map the required fields (marked with a red asterisk).
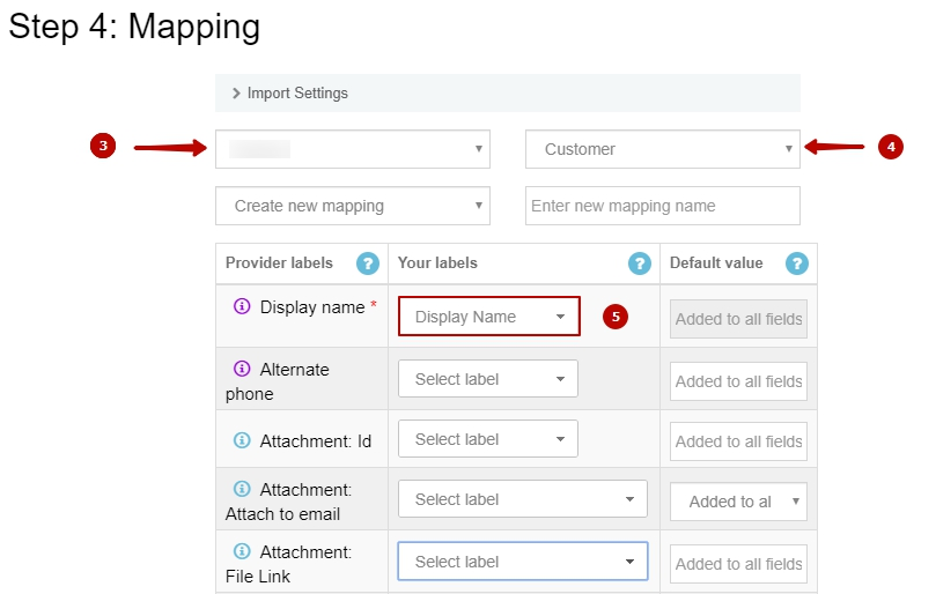
6. Make sure you’ve mapped New Display name field to NEW_NAME column from your file.
NOTE: “New Display name” field is going to show up under the mapping ONLY if you have the NEW_NAME column in your import spreadsheet. Otherwise, it will be not visible under the mapping list.

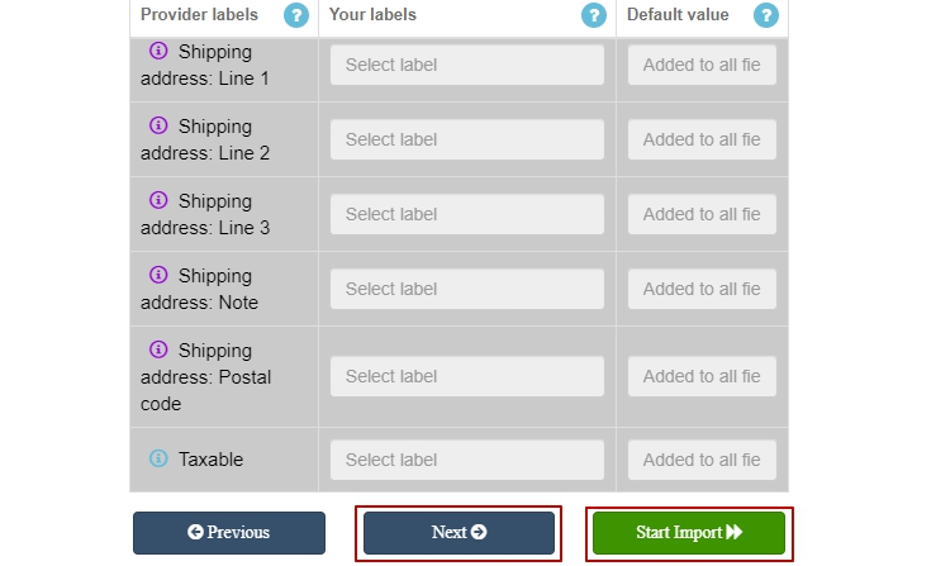
7. Scroll down the page and click on the Next button to see the Preview, or click on the Start Import button to skip the Preview step and initiate an import.
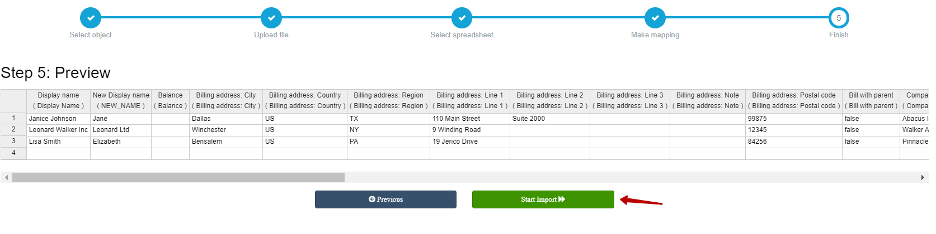
Preview
Review your data and alter it if needed by double-clicking the necessary field, then click on Start Importbutton.
Import Results
Check import results in the opened Import log.
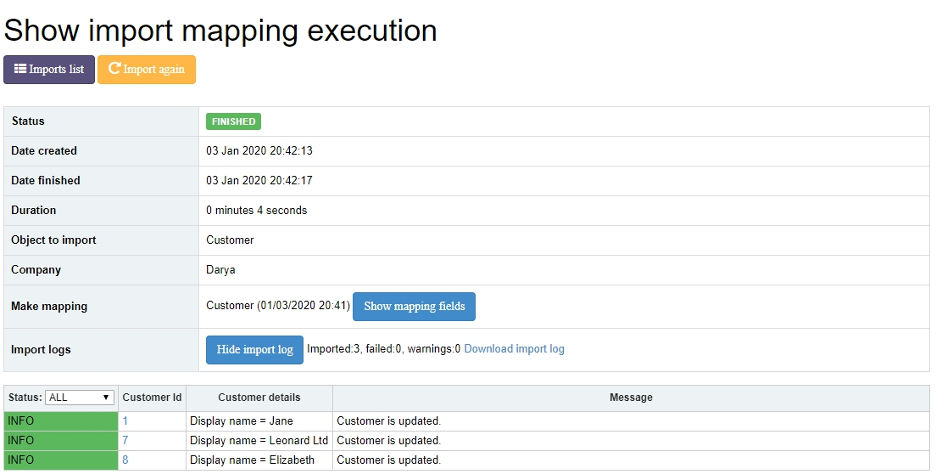
**Tip: Click on the Customer Id in Import logs — and the app will automatically redirect you to this updated Customer in QuickBooks Online.
Alternatively, go to your QuickBooks Online company and check the results there.
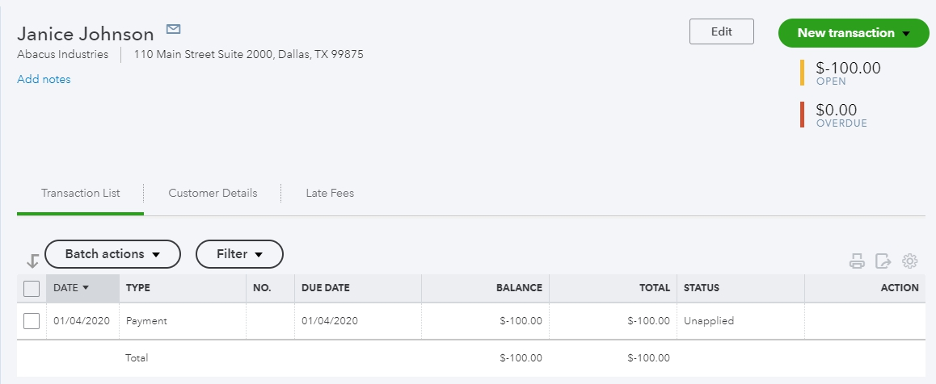
Customer before Update
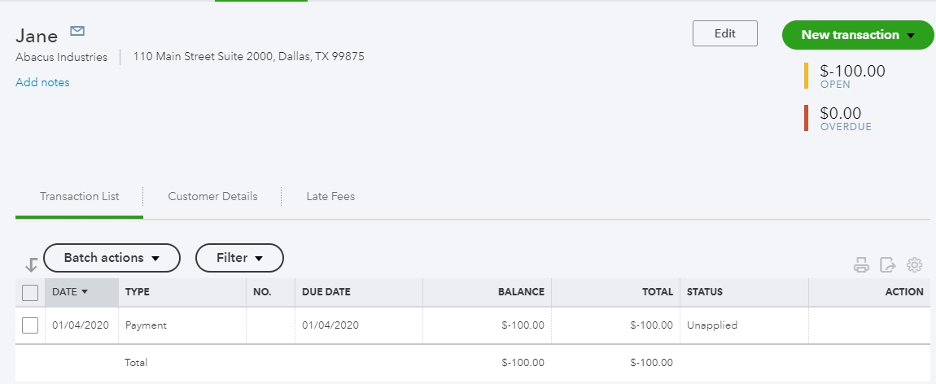
Customer after Update
Useful Tips on how to update Customers, Vendors and Employees
If you want to update not only Display names, but also other fields of Customers, Vendors and Employees – just proceed with the steps above and map all the fields you want to be updated. Follow this link to see a detailed guide on how to partially update your Customers, Vendors and Employees in QuickBooks Online using Business Importer.
Congratulations! Now you can easily update Display names of Customers, Vendors and Employees in your QuickBooks Online company using Business Importer.
Feel free to contact us in the online chat in case of any inquiries or suggestions! Our support number and email are specified in the footer of the page below, we would be glad to hear from you in case of any questions.
Comments open