How to enable Service Date in QuickBooks Online
Using this quick guide you will be able to turn on the Service Date field in QuickBooks Online in order to use it with the Business Importer app.
Overview:
1. Steps on how to enable Service Date in QuickBooks Online
In order to enable the Service Date field in your QuickBooks Online company follow these simple steps:
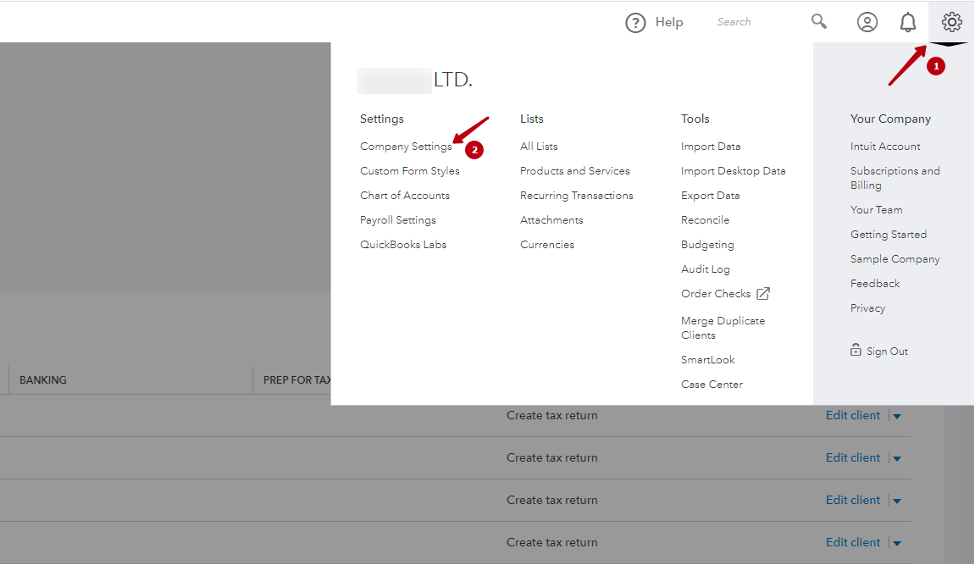
1. Click on the Gear icon in the upper right corner of the page.
2. Select Company Settings.
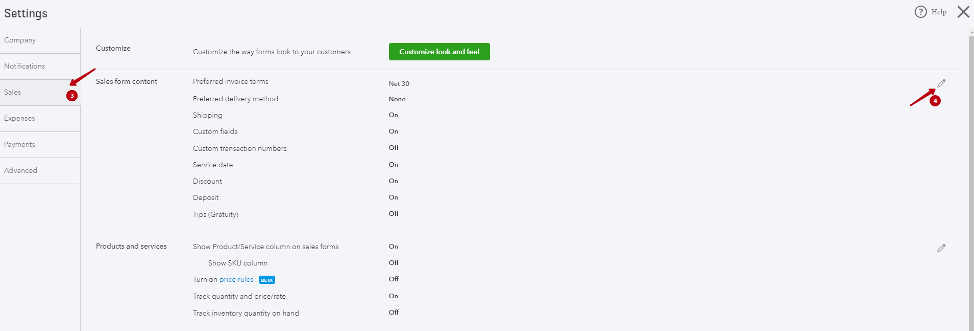
3. Go to the Sales tab.
4. Select the Pencil button to edit.
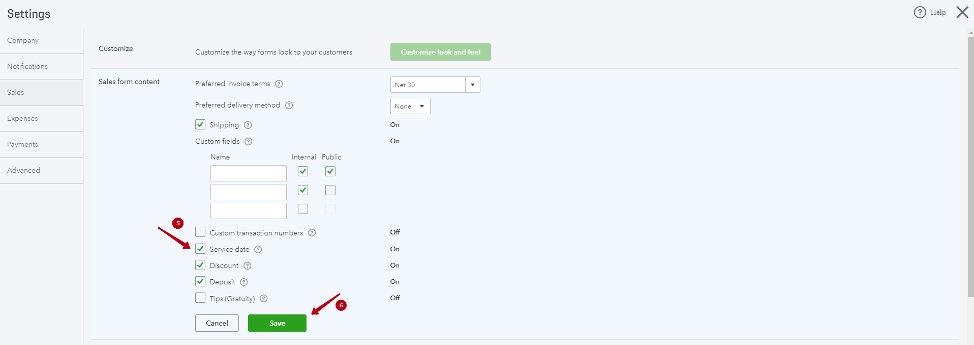
5. Enable the Service Date field by checking the box.
6. Click the Save button to update your settings.
You have now successfully enabled the Service Date field in your QuickBooks Online company, so now this fields will be available in the Business Importer app for bulk transactions import.
2. Useful tips on how to manage QuickBooks Online settings
1. Please, note that various fields in Business Importer will be available only after you enable them in QuickBooks. If they are greyed out on mapping, they are to be enabled in QuickBooks.
2. You can check our the guide on bulk invoices import with Business Importer app into QuickBooks Online, this entry supports the fields you just enabled
Remember: if you have any questions you can address them to us. We’ll be glad to help you!
Just leave us a message filling out our contact form or use the phone/email mentioned in the footer of every page.
Comments open