
How to import Bank Statement into QuickBooks Desktop
Connect QuickBooks Desktop and Business Importer Desktop applications:
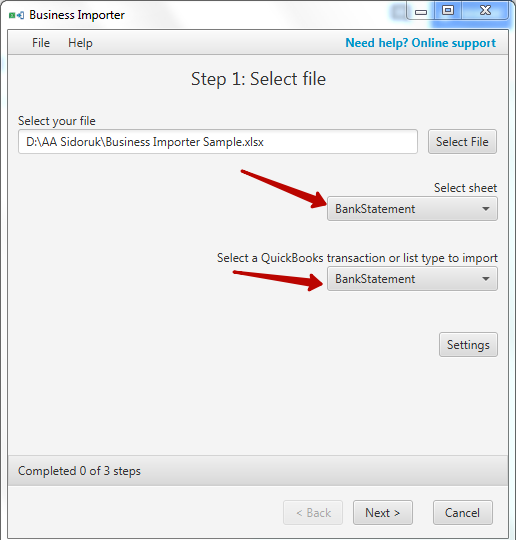
STEP 1:
Select your file (Excel) containing Bank Statement. You can set up the sheet with the help of the Business Importer Desktop excel sample file, which was saved on your desktop when you installed the application.

Step 2:
Select the appropriate sheet for the import and coinciding QuickBooks transaction or list type from the application dropdown list.
Step 3:
Edit application settings, if needed. Click Next.
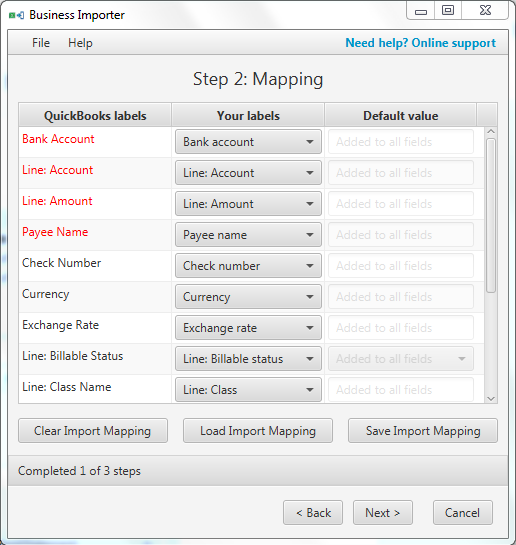
Step 4:
To set up the mapping, connect your labels to QuickBooks Desktop labels. Save your Mapping to use it in subsequent imports, or upload the saved import. You can also set default values to the fields, and they will be applied to all lines of your transaction. Click Next.
Note: The fields marked red are required, they are needed for minimal successful import.
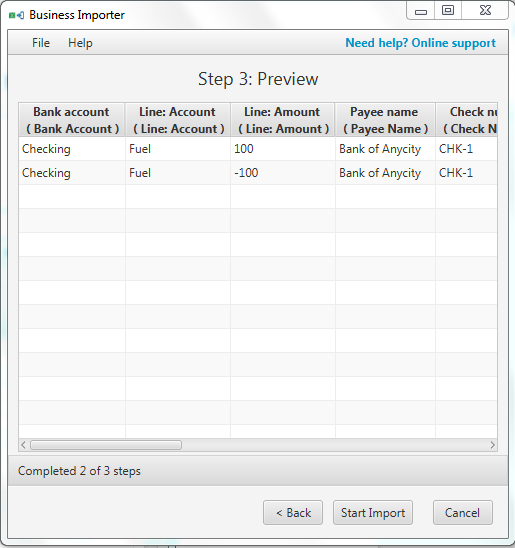
Step 5:
Preview the Bank Statement information you are importing into QuickBooks Desktop. Make sure all labels are mapped in a correct way. You can make changes in the preview table, if needed. Click Start Import.
Note: If you have changed information in your import file you need to start your import again and upload the file.
Import Results
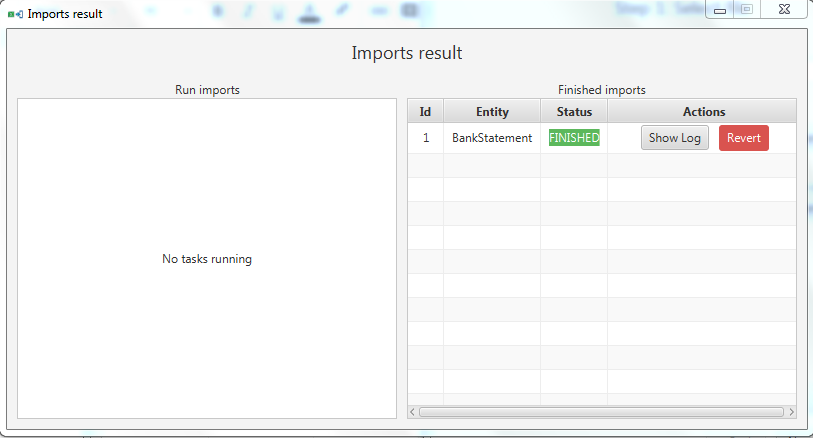
Results from QuickBooks company:
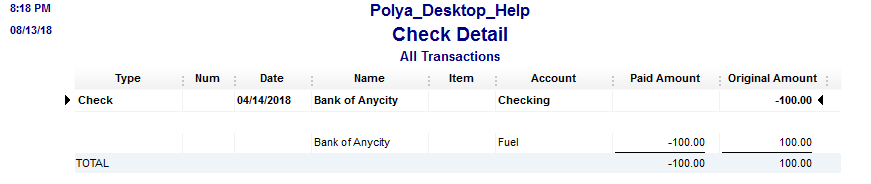
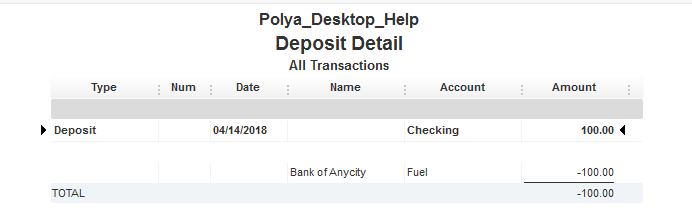
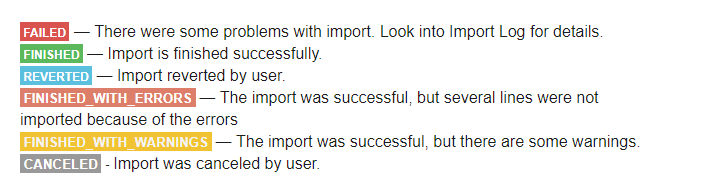
Possible variants of the result:
Bank Statement mapping fields
| Business Importer Name | Description | Example |
| Bank account | Use the name of deposit bank account from your QuickBooks company | Checking |
| Line: Account | Specify the name of line expense account | Fuel |
| Line: Amount | The amount of the transaction. | 100 |
| Payee name | The name of Payee from your quickBooks company | Bank of Anycity |
| Check number | Reference number of the check | CHK-1 |
| Currency | Currency used for transaction | USD |
| Exchange rate | Specify the exchange rate of the transaction. | 1,23 |
| Line: Billable status | Use values ‘true’ or ‘false’ to mark the status of the transaction. | True |
| Line: Class | Classes can be used to separate transactions into meaningful categories. (For example, transactions could be classified according to department, business location, or type of work.) In QuickBooks, class tracking is off by default. | First company expense |
| Line: Customer | A Customer refers to one of the customers (or customer jobs) on the list. | Lilly Rose |
| Line: Memo | Additional information about this expense line. | Expence on smth. |
| Memo | The memo that is printed on the check itself. | Thank you. |
| Transaction date | Date the transaction was made. | 14.04.2018 |
Most common errors when importing Bank Statement:
| Problem | Error | Solution | Correct example |
| The customer name specified cannot be found in your QuickBooks Company | Customer with name ‘John Doe’ not found in your company. QuickBooks error message: Invalid argument. The specified record does not exist in the list. | Specify the existing Customer Name or enable Customer/Vendor auto creation function in Business Importer Settings | Janice Johnson |
| The rate is not specified in the import file. | There was an error when converting the price “null” in the field “Rate”. | Please check your import file and specify the rate for each line of the transaction | 1.24 |
| Account for the transaction was not specified in the file. | There is an invalid reference to QuickBooks Account “null” in the Items. | Please check your import file and specify the account for transaction in each line of your import file, you can also enable account auto creation function in the Business Importer Settings. | Undeposited funds. |
Comments open