How to Import Transactions from DropBox into QuickBooks Online
Read this guide and you will find out how to import transactions with DropBox link into QuickBooksⓇ Online using Business Importe
Overview:
Prepare your DropBox link for the import
Step 1. Open your DropBox file
1. Open DropBox file you want to import
Step 2: Generate link from DropBox file
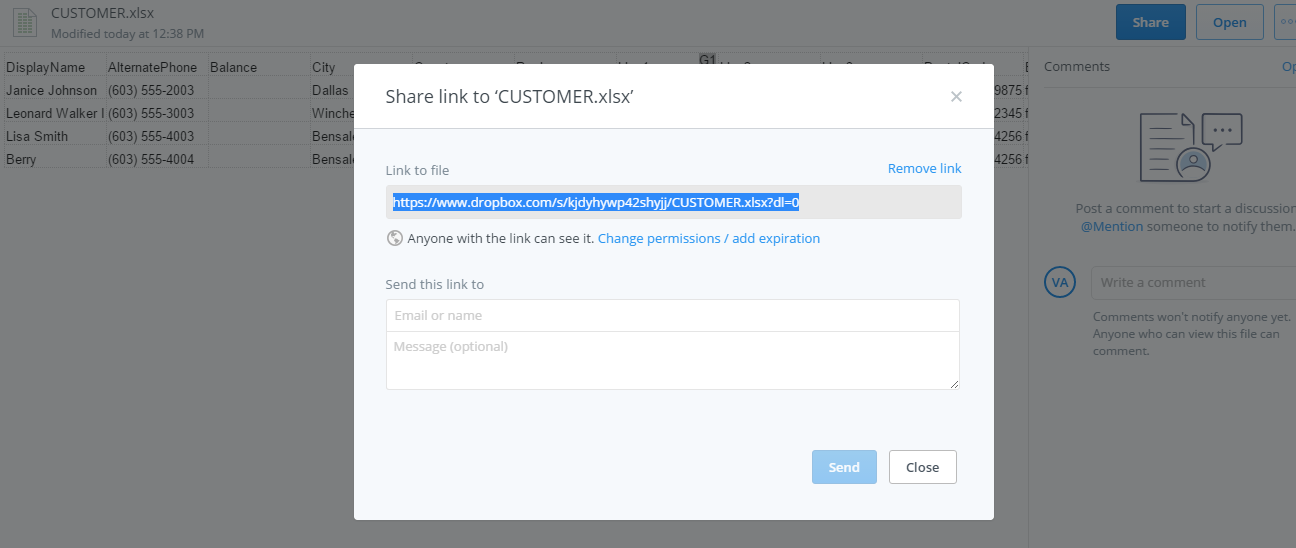
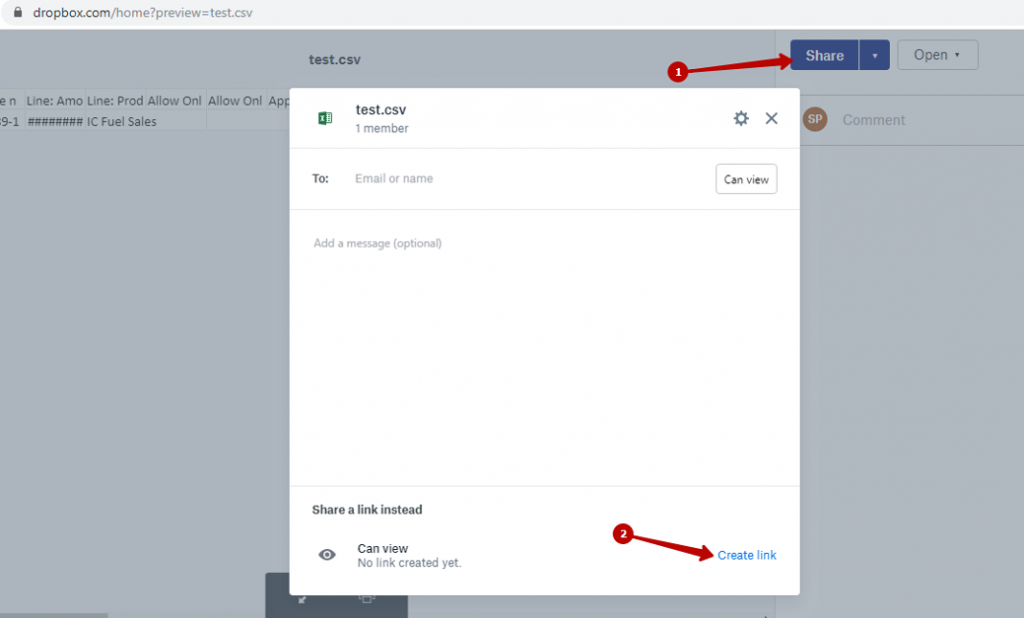
1. Press share in the top right corner then choose Create link
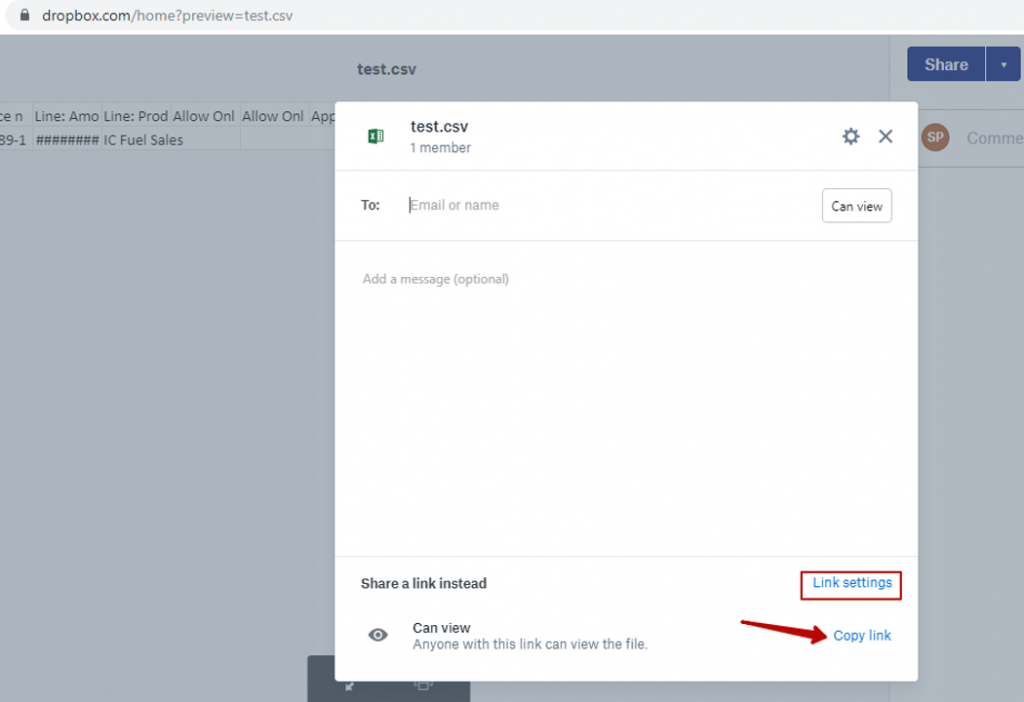
2. Check you have “anyone with link” selected in “Who has access” in your Link settings and press copy link
Upload DropBox file into QuickBooks Online
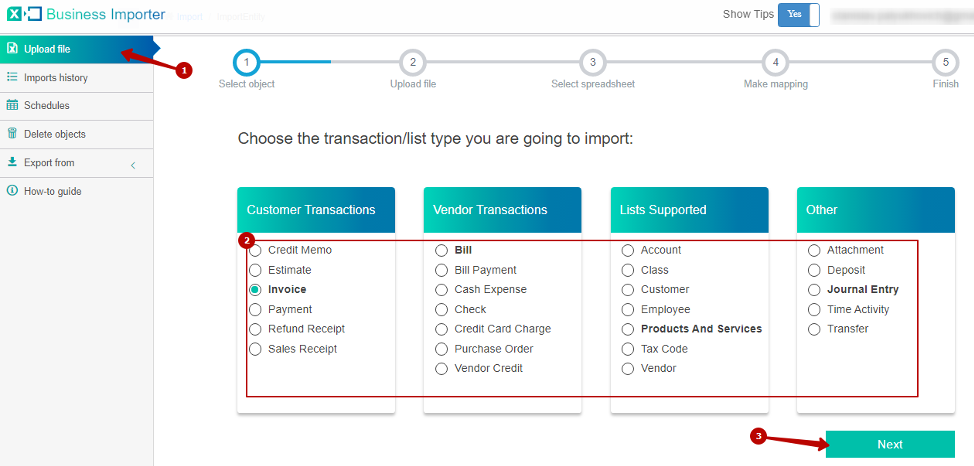
1. Open Business Importer app and press Upload file on the left hand menu
2. After selecting required entity press Next
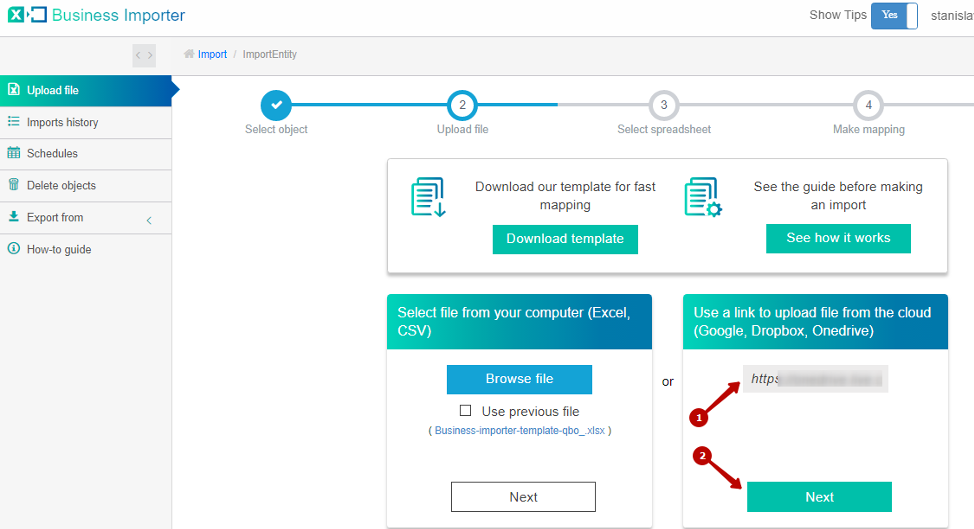
3. Paste the link generated by DropBox and press next
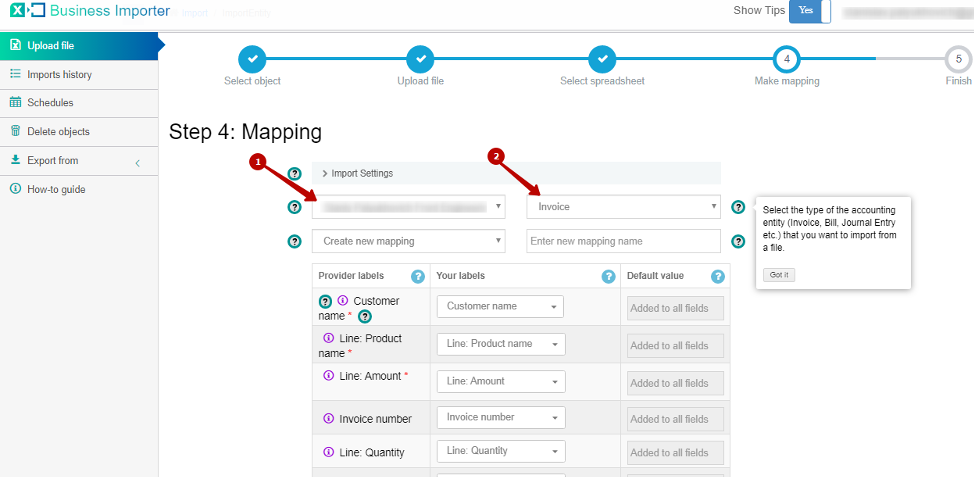
4. Proceed mapping: select the Company Name(1) and double check import Entity (2) and do the Mapping. Mapping means connection of QuickBooks fields (Provider Labels) to the headings of the columns form your import spreadsheet (Your Labels). After that scroll down and click Start Import.
5. Congratulations! The DropBox file has been imported successfully.
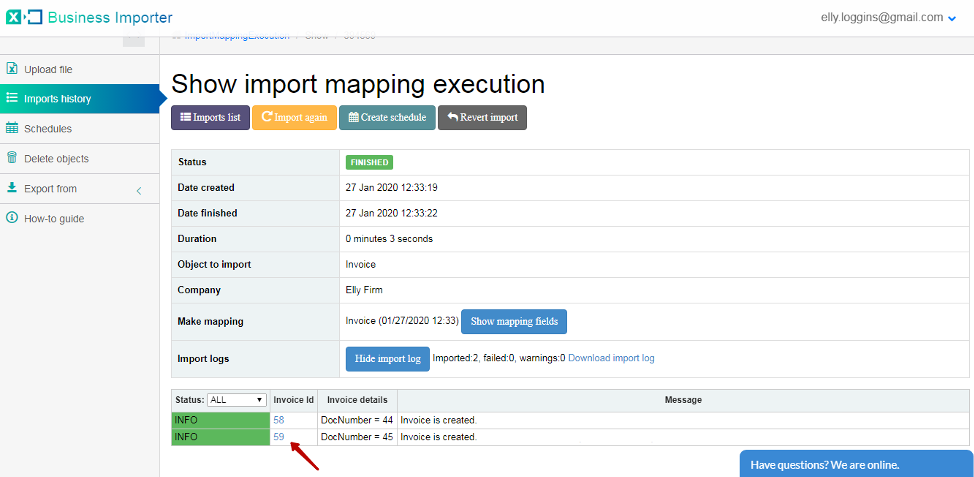
Click on Invoice ID to see your Invoice on QuickBooks side.
Tips on the import of DropBox files into QuickBooks Online
1. If ‘Require viewers to sign in with their corporate name account’ option is enabled you will see ‘Unknown file store’ error in the process of importing the file. Also try uploading your file again in 2-3 minutes, as a time lag of DropBox permissions update could cause it.

2. You can delete transactions from QuickBooks Online side with the help of our app. Check this simple guide to know how to do it.
3. Another useful option for Business Importer Online app is that you can easily schedule your imports.
Remember: if you have any questions you can address them to us. We’ll be glad to help you!
Just leave us a message filling out our contact form or use the phone/email mentioned in the footer of every page.