
Business Importer Desktop: How to Import on the example of Invoice
Reading this guide you will learn how to:
- Import
- Customize settings
- Save Mappings for future quick imports
- Revert imported transactions
- Go about Logs
When Business Importer Desktop is authorized and ready to use follow these steps for your first import.
- You will see the first step of the application “Select file”. On this step, you should
- Select file with your data (*.xlsx, *.csv).
- Check out where the templates located on your machine.
- Select the sheet you want to import in case you have several.
- Select import entity.
- Check out Settings.
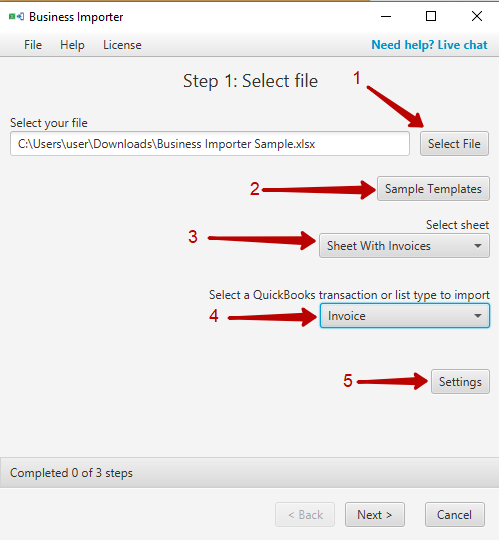
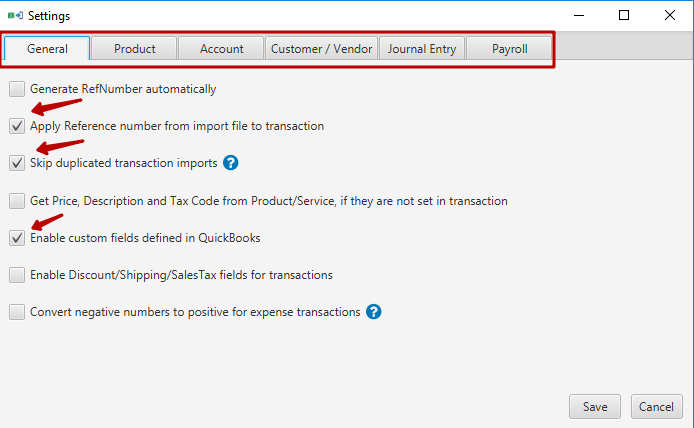
- You can configure your import on this step as well. Click “Settings” button to see available settings. You can skip duplicates, use custom fields, create automatically accounts, customers, vendors, and items and more.
If you are ready to continue save settings and click “Next”.
- On “Mapping” step, you map columns from your file to QuickBooks fields. For this, you need to Select Label (column heading) of your file from dropdown or type in default value for all fields in the Default Value field.
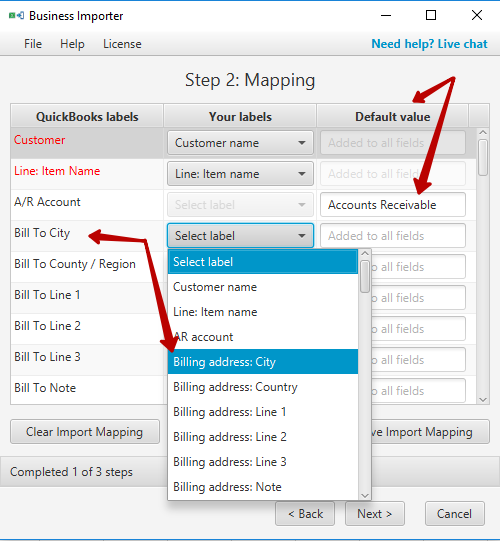
Note: After you mapped the file, click “Save Import Mapping” button and set name of your mapping. Next time just select your import mapping to map all fields automatically the same way.
Note*:Fields that are highlighted red are required.
If you are ready to continue, click “Next”.
4. On “Preview” step, you can see your data that were mapped to QuickBooks fields. On this step, you have the opportunity to edit value in rows by double clicking the corresponding cell.
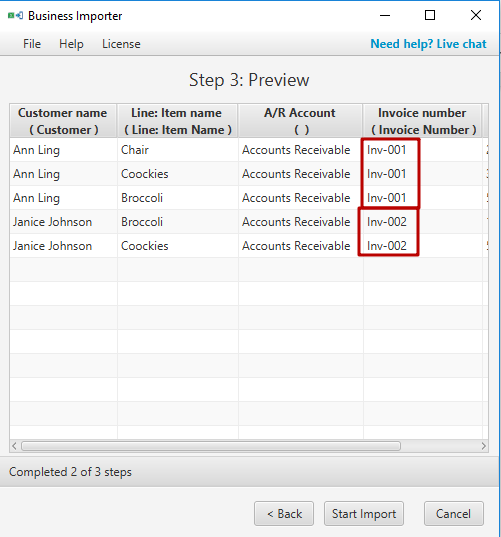
Note: to join several lines to one invoice set the same invoice numbers to those fields, the app will join them during the import.
If you are ready to import data to your QuickBooks company, click “Start Import”.
- Your import was successful, so go ahead and check results in QuickBooks. You can always Revert import, if you would like to delete all the transactions imported by the app.
Note: auto created objects will not be deleted from your QuickBooks during revert.
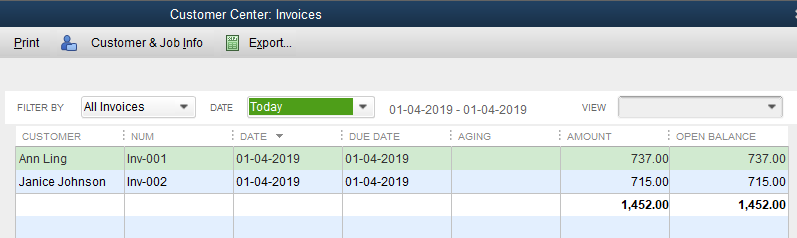
See results on your QuickBooks desktop
Additional Info About Import results:
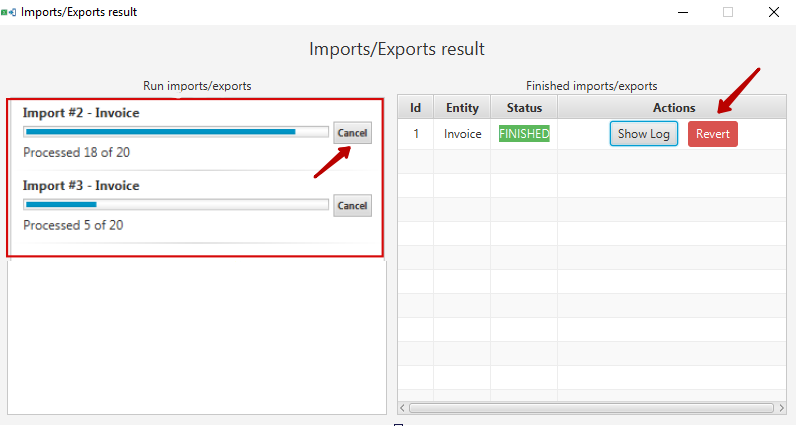
- You do not need to wait, when import is finished, you can start another import and Business Importer will import your data in parallel and notify you by adding a notification on bottom right of your screen.
You can abort import by clicking the button “Cancel”, or “Revert” it.
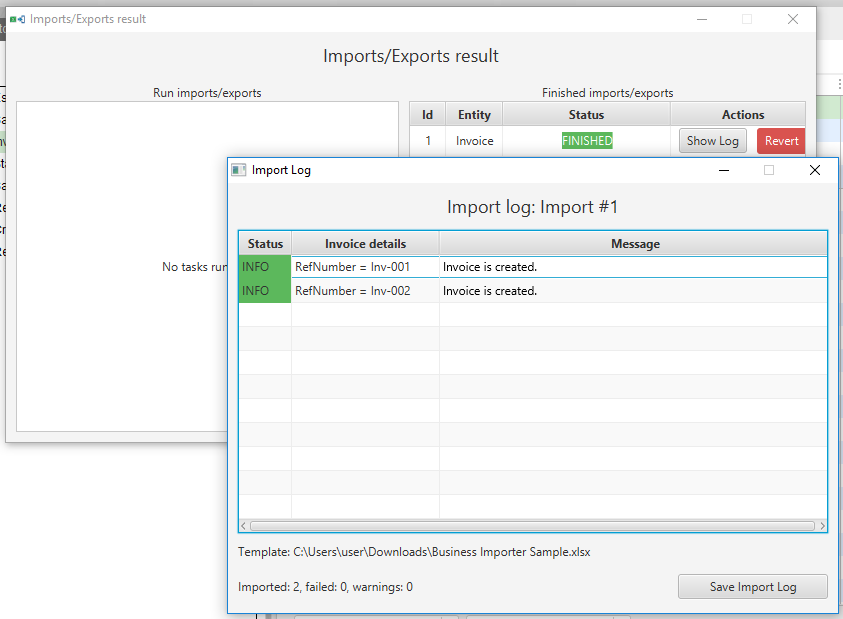
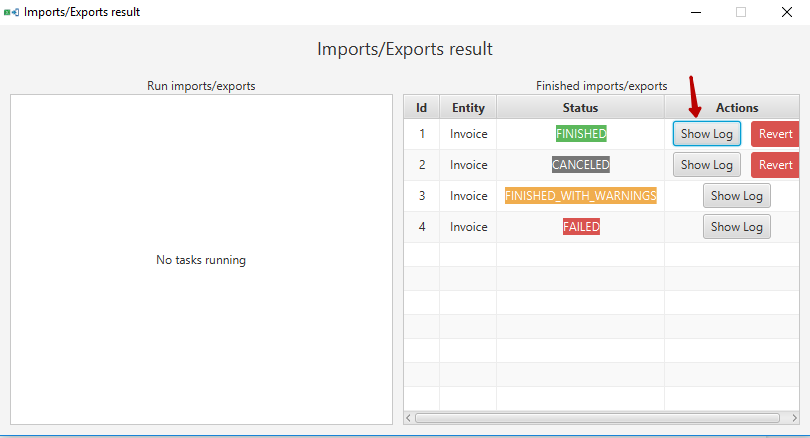
- The import will appear with corresponding status in “Finished imports/exports” section. If something went wrong on importing you will see the import with status “FAILED” or “Finished With Warnings”. To see details of import just click the button “Show Log”.
Also, you can save import log as separate file. Just clickShow Log -> Save Import Log button and set the name of your log. You can send it to help-desktop@cloudbusinessltd.com so that we can help with the issue along with the System Log file located in “YOUR_HOME_DIRECTORY/Users/user/Documents/Business Importer/logs/bimports.log”.